
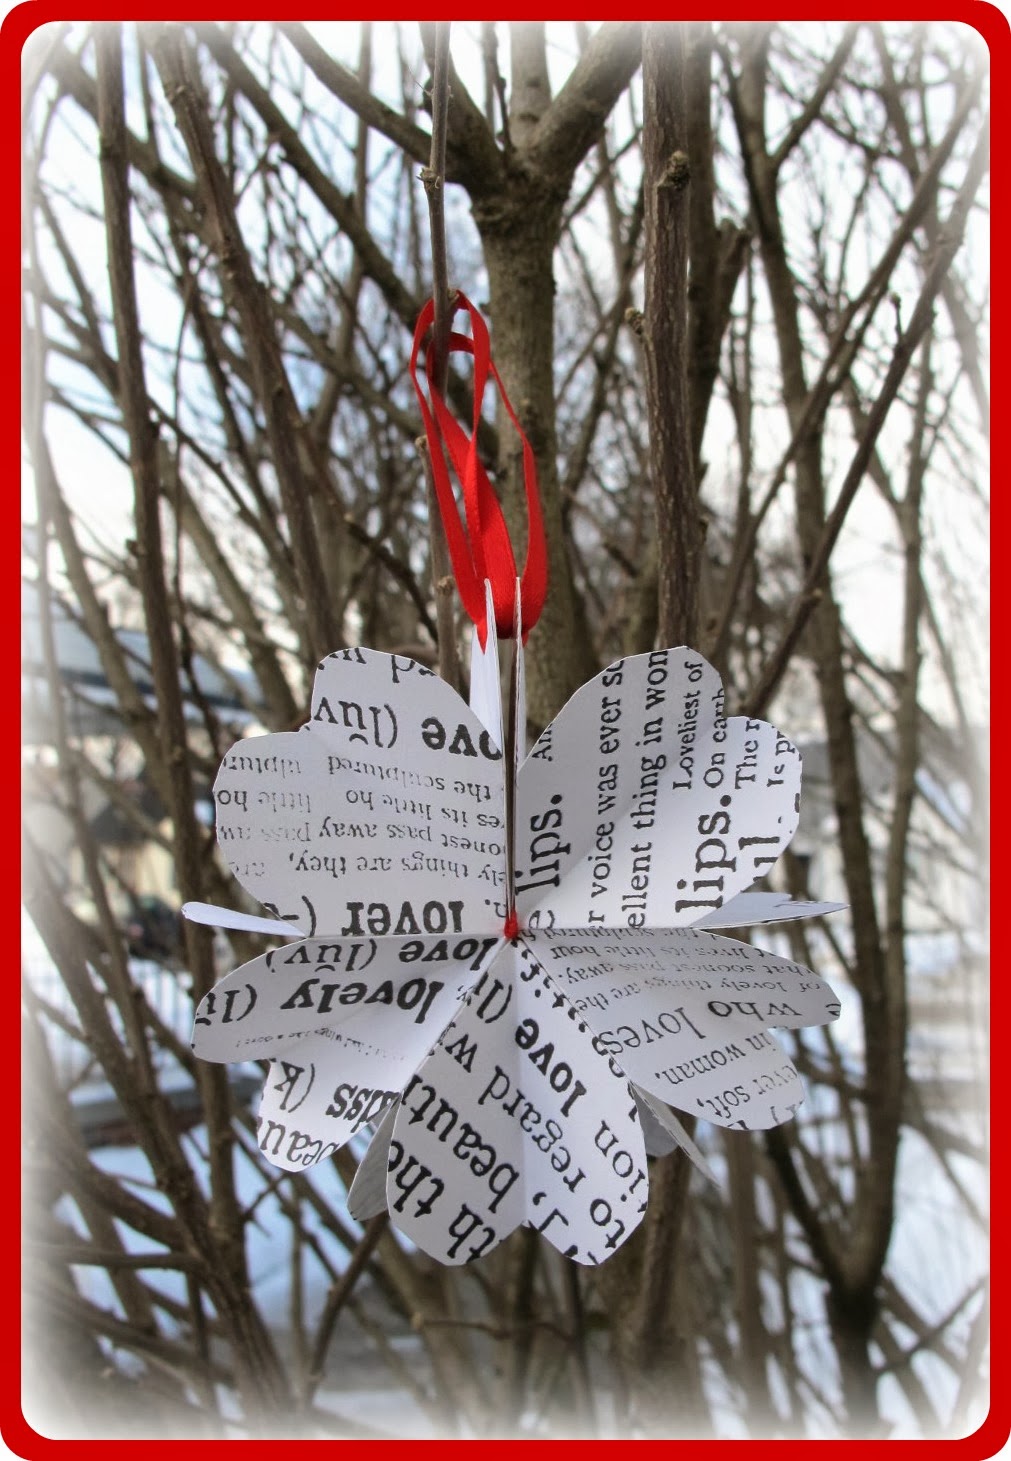
This structure is based on an origami star book that I learned many years ago. I'm not sure if it is a "traditional" structure, as in it has been done for centuries, or a contemporary structure. If it is a contemporary structure, I don't know who the designer is. (If I ever find out, I'll put in an edit.)
Also, I'll be honest. This tutorial was done rather hastily. Instead of waiting for the perfect light (for the photographs) and making perfect folds and cuts and having a gorgeous, MOMA* worthy final product, I wanted to get the information out to you. (And, the longer it took me to write this tutorial, the more I wanted to redo everything. The pages are bland, the pictures could have been better, and so on.) So, you'll have to do the gorgeous, MOMA worthy final product. (But don't, first make a crappy one and then make one for your best friend.)
*Museum of Modern Art (in New York City)
SUPPLIES
The materials needed are:

- paper for pages (text weight, something easy to fold)
- paper for covers (cardstock weight)
- scrap paper to make heart templates (cardstock weight)
- ribbon (I used 1/8" wide ribbon for my structure)
- glue
- straightedge and craft knife or paper cutter
- bone folder (optional; to use when folding the pages)
- scissors
CUT PAGES AND TEMPLATES
For the tutorial I made a book that started with 3" squares but you can do any size square. Cut 5 pieces of 3" squares of pretty paper for the text pages. Cut 2 squares out of the scrap paper: one that is 1.5" square and one that is 1.5" plus a little bit more, I did 1/16" more. These will be used to make the heart shape templates for the pages and cover.(If you start with bigger or smaller squares for the pages, the template size for the pages is half your page size. So if you start with a 5" square, your page template will be 2.5" square and then the cover is always just a little bigger. It'll make more sense as you read on.)
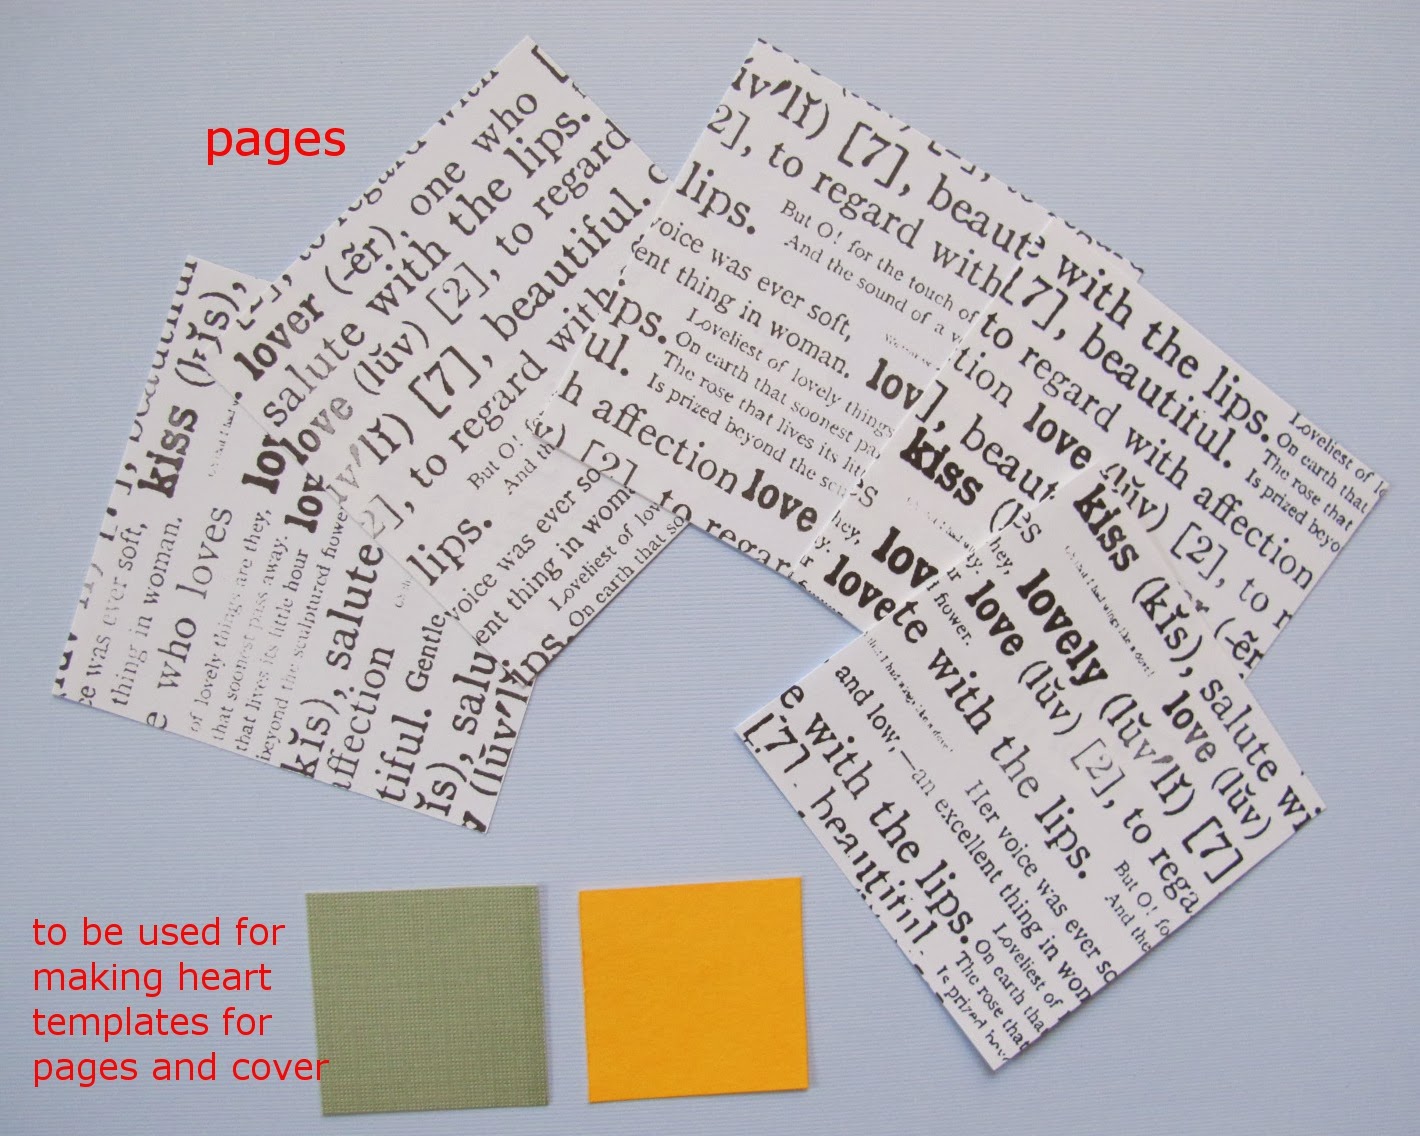
(Note: use different colors of cardstock for templates for cover and pages or mark them somehow so you don't make yourself crazy.)
FOLDING THE PAGES
Part A

- Don't believe the text in the picture, I just realized you don't want to start with the "pretty side" facing up, you really want the "pretty side" facing down on the table and the "plain side" facing you. However, once you fold it, the "pretty side" will be facing up. If you use a solid color, this point doesn't matter.
- Fold paper in half.
- Open paper up.
- Fold in half the other way. Again, start with the "pretty side" down and "plain side" toward you.
- You will end up with two folds dividing the paper in quarters with mountain folds (will look like this: /\) on the "pretty side" and valley folds (will look like this: \/) on the "plain side"
Part B

- With the "pretty side" facing up, fold paper on a diagonal.
- Open paper up and place it "pretty side " down on the table.
- With your finger, push down at the center point and the piece will sort of "pop up" and the folds will be in the correct configuration to be folded into a (smaller) square shape.
- Fold the paper "closed" like in the picture below.

(Hopefully, if my words don't make sense, the pictures will.)
Now, repeat the above with the other four pages!
THE HEART PART OF THE HEART BOOK
You now need to make these:

into these:

Remember those cardstock pieces I had you cut out to use as templates? This is where they come into play.

OK, so the picture doesn't tell the whole story but I think you can get through this one without step by step photos. I will give you some tips that helped me:
- do the page template first
- if symmetry is very important to you, cut a piece of text weight paper, fold it in half on the diagonal and draw/cut out that first and transfer it to the cardstock template
- I like the way fat hearts look but you can make it thinner. However, don't make it too much of a point at the bottom. You need to keep the bottom squared off for the integrity of the structure. In the picture you can see what I mean, notice where the lines stop.
- use the page template to make your cover template, just enlarge it a bit

Use the template to cut the pages. Place the bottom/point on the folded side.
Because you're cutting through four layers of paper, this is a trick I used to cut the point in the center of the curves:

Cut one side up to the point. (I'm right handed so I cut on the right side.)

Flip the piece over, put the template on top and cut the right (or left if you're left handed) side again to the center. Yay! You have a nice center without the cussing and mangled paper.
"BINDING" THE BOOK
Well, you're not going to bind it in the traditional way of sewing,but you will be binding the structure together. And you're going to do it with glue.

Put glue on one of the heart pages and adhere it to another one. (This picture shows just a blob of glue to illustrate the placement of the glue but you would, of course, spread it around.)

Then put glue on the second heart (the one you just glued) and adhere it to the next heart/page. (Again the blob for illustration purposes.)

Continue with the rest until all five are glued together.
THE COVERS
Before you cut out the paper you've chosen for the covers, double check with your template that it is, indeed, slightly larger than your pages.

It doesn't need to be very much larger, as you can see by the picture. Mine is probably about 1/16" larger. On the other hand, you could make yours even a little larger than I did. It depends on what you like and what your mood is.

Cut out the covers using your template. An easy way to get the heart shape in a particular area on patterned paper is to hold the paper up to a light source (lamp, window, etc) with the "pretty side" toward you and move the template around on the back side of the paper. When the shadow is over where you like, hold it there, flip the paper over and draw around the template.
ADDING THE RIBBON CLOSURE AND COVERS
The ribbons are used to keep the book closed shut and also to keep it open. I used loops at both ends because it's fun to hang it up but you don't have to have them.
I used 1/8" wide ribbon because it's a small book. If you make your structure larger, you may need a wider ribbon, depending you large you make it.
First, measure your ribbon. I sort of eyeballed how long I wanted the loop. It needs to be long enough to tie. It ended up being 2 1/2" long. You can see by the picture how much overlap I allowed for gluing, but it's probably about a 1/2". You could even do more but I don't think I'd do too much less.

I used 1/8" wide ribbon because it's a small book. If you make your structure larger, you may need a wider ribbon, depending you large you make it.
First, measure your ribbon. I sort of eyeballed how long I wanted the loop. It needs to be long enough to tie. It ended up being 2 1/2" long. You can see by the picture how much overlap I allowed for gluing, but it's probably about a 1/2". You could even do more but I don't think I'd do too much less.
Then wrap the ribbon around to the other side, do the loop and overlap and cut the ribbon.

I initially used the paper clips for photographic purposes but I would recommend using them because they keep the ribbons nicely in place then you're gluing.
You probably don't need to be shown how to glue but I took pictures so you're going to see it anyway.
Put the glue on the paper to save your sanity. I used Aleene's Original Tacky Glue. I like how it works with fabric (ribbon) and it sets up somewhat quickly.

Glue the end of the loop in place.
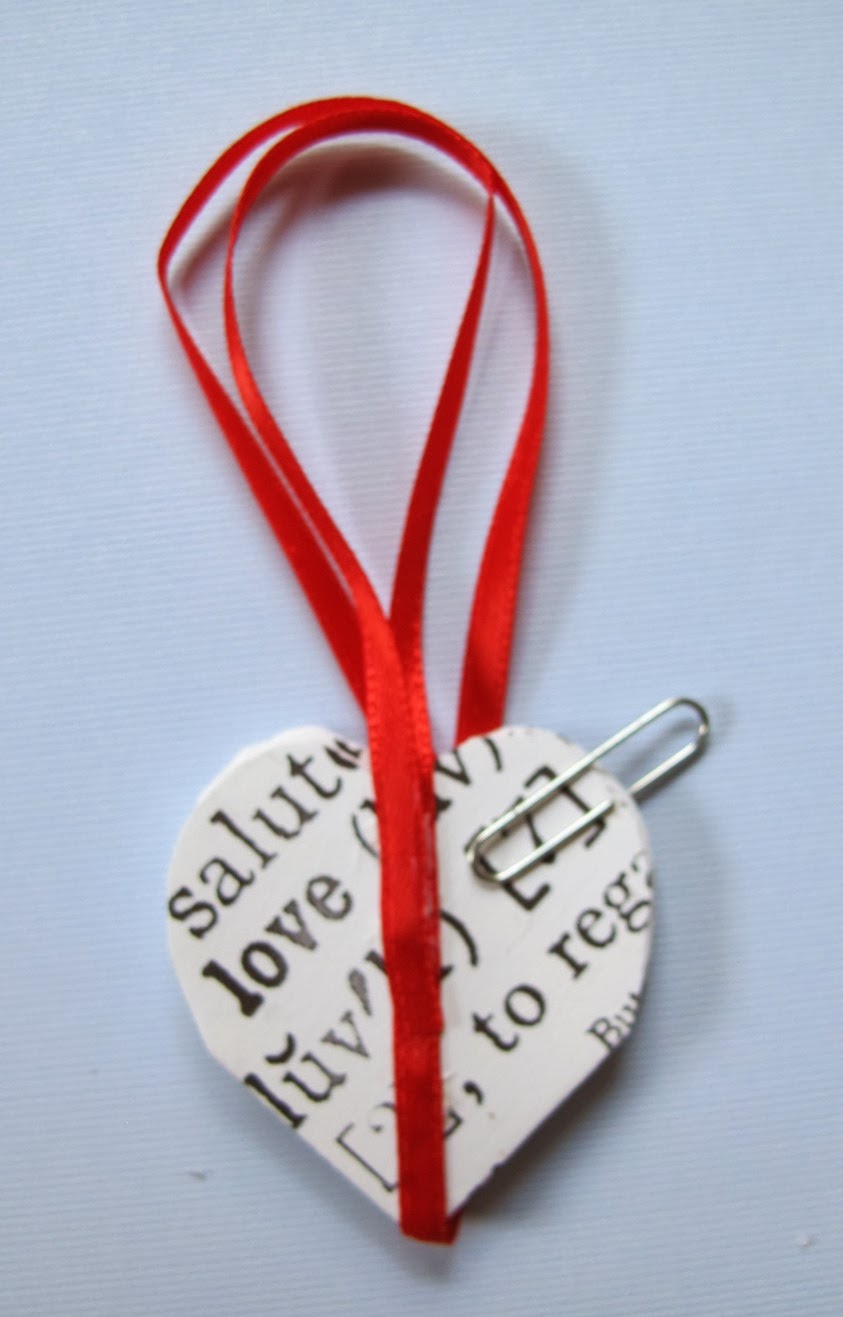
Repeat on the other side.
Glue covers over ribbon.

And you have completed your book!


Book tied closed.

Book tied open.

I left the inside of my demo blank but you can write, draw, stamp or otherwise embellish the inside. However, this is best done beforehand. (After you fold and cut the shape but before you glue it together.) You might want to do a quick blank one first so you'll know where to write/place images. In general, if you want it to read like a traditional book, you'll be writing on the non-folded sides but don't let that stop you from doing it in other ways. (Meandering around; a he said/she said with one story going one way and the other going perpendicular; a word in each of the curves; you get the idea, have fun with it.)

I hope you've enjoyed this tutorial. If you have any questions, you can ask them through the comments or with the "Send me an email!" widget on the right side of this blog. If you make this book, I'd be delighted to know how it turned out and would be over the moon if you decided to send me a picture! (Remember, it doesn't have to be MOMA quality, did you take a good look at my pictures? ^_^)


