
Part One: Cards

These are the "card" projects that I had at Maker Faire Detroit. I'm dividing the projects in two or three posts because I want to show the circuit paths both with and without notes and I didn't want the length of the post to get too unwieldy.
Two quick notes: I took these pictures after Maker Faire and after they were abused examined many times over so they may look a little tired but that's because they are. However, this speaks to the hardiness of these structures. Also, all of these use Jie Qi's ingenious paper battery holder. The link takes you to a page where she generously provides a PDF of the holder to cut out and use as well as a link to a tutorial. Any adaptations are noted in the descriptive pictures.
The one shown above is the first card I experimented with. To see it with the light on and what the inside/circuit looks like without all the notes, please click -> flower paper circuit


The one shown above is the first card I experimented with. To see it with the light on and what the inside/circuit looks like without all the notes, please click -> flower paper circuit

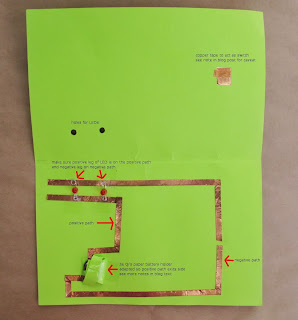
This is the circuit with my (hopefully) helpful notes of what's going on.
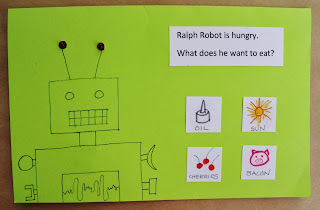
Ralph Robot


There's a note on this one to look here for the reason for the longer piece of copper tape on the "switch". Here's the scoop. I used two pieces of copper tape next to each other to cover the open space I cut out. The circuit worked but was finicky, most of the time it would work but sometimes, it wouldn't. During a slow time at Maker Faire, I took a close look to see if I could figure out what the problem was. I mean, c'mon, this is a very basic circuit. Well, there was a hairline gap between the two pieces of copper tape. I put in another piece to cover it and that was the solution! So, when you're making your own structures, keep this in mind. Really, the gap was barely noticeable and yet it affected the connection to an annoying degree.
Santa's Treats


I decided to play around with needing to press two "switches" to complete the circuit and light up the LED. This is a tribute to my dad. We always left a can or bottle of beer and some cookies out for Santa. I guess I should have done the traditional milk and cookies but it was fun watching people try different combinations and the reactions to the correct combination. Who knows? Maybe some little ones will remember and there will many happy Santas this year!


Since several teachers and librarians were interested in this for activities, I'm including the very basic circuit and a one path version of the open circuit demo. (The three path one I had at Maker Faire was really an experiment for a project I had "issues" with and was unable to get done in time.)


basic paper circuit off

basic paper circuit off
(the battery only turns the lights on, I moved the flower punches ^_^)
This was the first paper circuit I "built" which I posted a few months ago. The two turns are there only because I wanted to practice the technique. (Jie Qi's tutorial of her paper circuit battery holder and copper tape turning technique.) The flowers are there to "make it something". You could make them fireflies or a lighthouse using just one light or candles or .... you get the idea.

open circuit
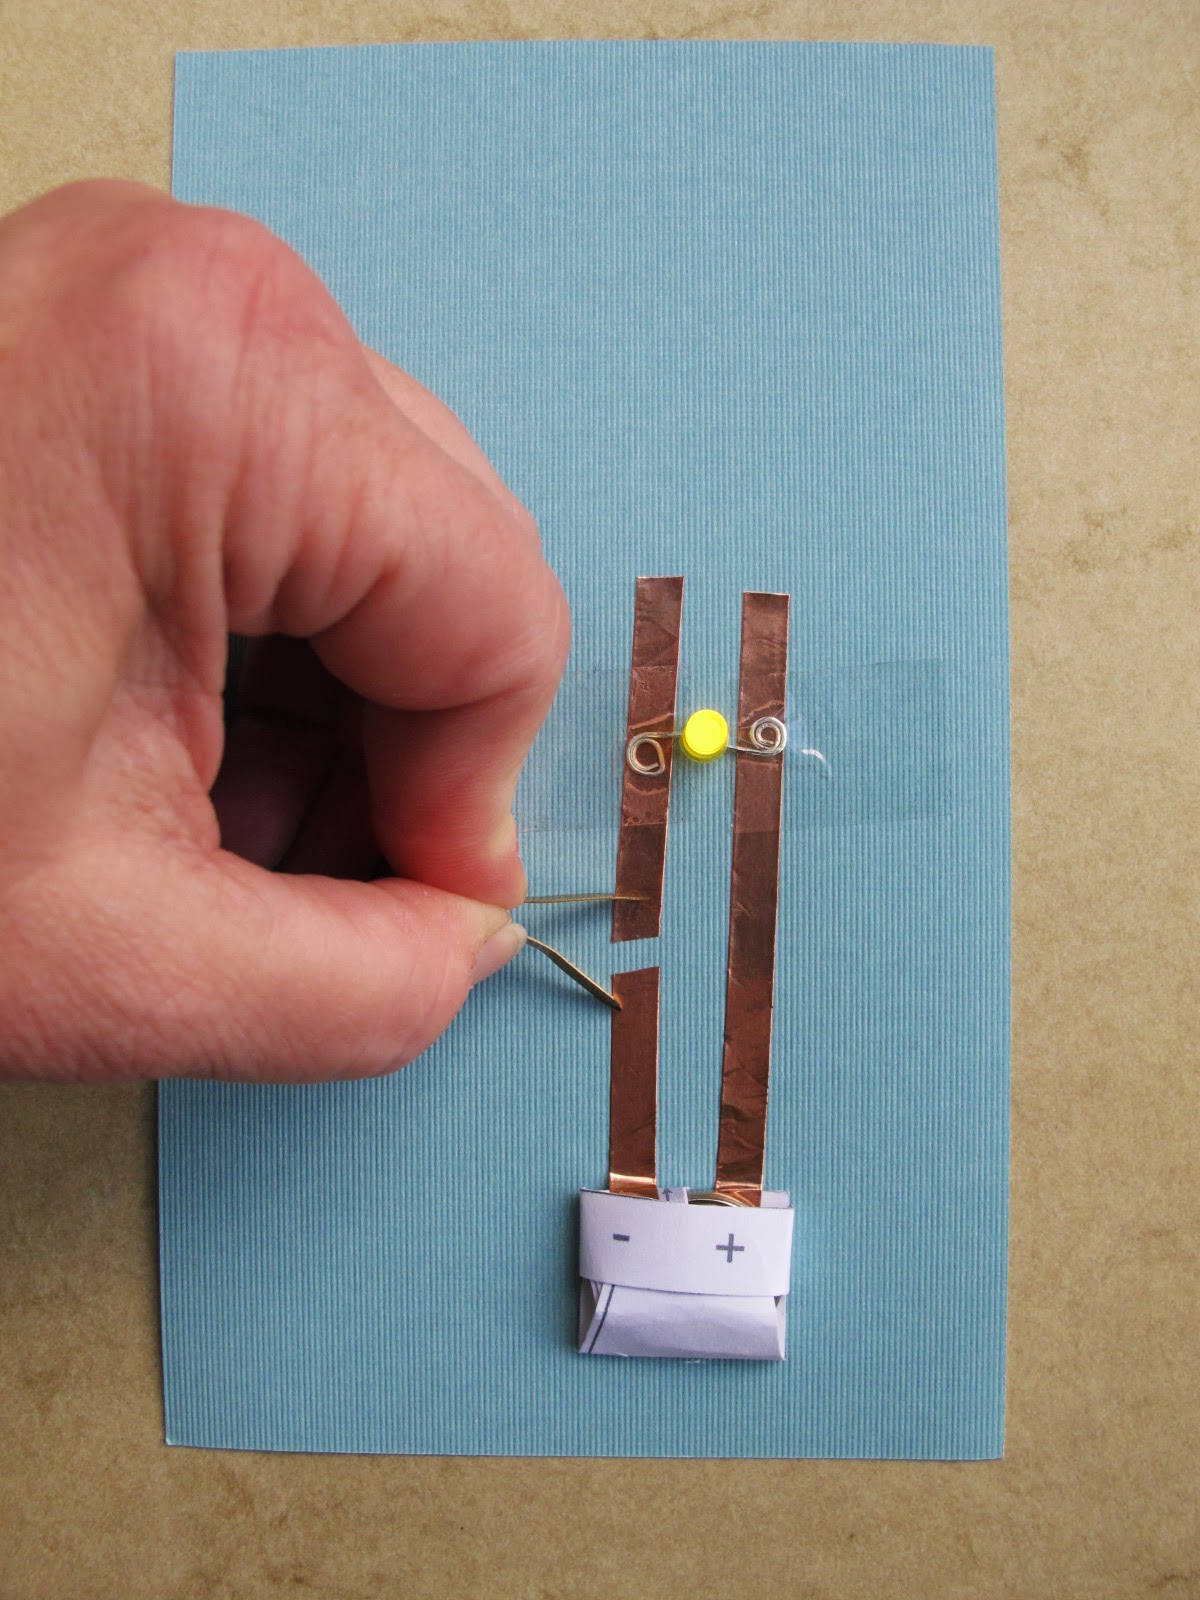
open circuit closed using paper fastener
If you don't happen to have a paper fastener, you can use a paper clip bent in a V or U shape or just the way it is (without bending) and lay it across the gap. You do need to apply some pressure whatever you use so there is good contact.
OK, that's it for the "cards". Next up: the books.
Wow! I can't believe I found your blog. I met you at the 2013 Detroit Maker Faire and have been looking for information about how you created your cards ever since. Thanks for this awesome tutorial.
ReplyDelete