
Part 2:Books
Here are the book projects that were shown at Maker Faire Detroit this year.


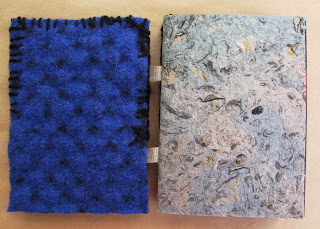
 front cover
 spine
spine


LED Spine

This is the completed project that I wrote about here: using pamphlet stitch to hold LEDs. The use of beads along the spine sewing seemed to work out securing the LEDs in place. At least at home and for the first day of Maker Faire. The second day, the LEDs were finicky in their contact as well as the battery contacts.


The day was cool and not all that humid (strange words to be said for Maker Faire as the previous years were quite hot and humid), but it wasn't all that dry, either. Paper reacts to moisture (and lack thereof) but I'm not all that sure that was the problem. Needless to say, this structure needs work and the ways to improve are already forming in my head.

I like the idea of using the spines as a grid to move around LEDs to make patterns and letters so I want to keep working at it to make the structure more stable. I will post my progress.


Starlight Book
Despite a design flaw, I have to admit, I'm rather pleased how the Starlight book turned out.


(I really need to figure out how to take pictures to show lit LEDs)
The flaw: I had to tell people to put the magnet in place (in order to close the circuit).

cover with magnet switch in its best door knocker disguise

magnet in place to close the circuit
I was conscious of this while I was making it but I consider this (all of the projects, really) as prototypes just to get the "mechanics" in place and see if the structure is viable. Luckily, the venue of Maker Faire is for sharing ideas and, in this spirit, I felt confident to "make it public". Once I work through a graceful solution, I'll let you guys know.


Big Dipper Book
This last book is really a soft circuit project as I used conductive thread for the circuit path. The covers were felted (technically fulled) sweaters and the binding structure is known as "sewing on tapes". These linen tapes used for binding the book carried the conductive thread/circuit path from the LEDs on the front cover to the batteries on the inside back cover. Again, and I'm sure you're getting sick of me saying this (but get used to it), it's a prototype, so the blanket stitching to hold the two layers that make up the covers is sloppy and was only done halfway so I could show how the structure was put together.


back cover
I used two layers of fabric so the battery holders wouldn't be exposed. They could, however, still be accessed through flaps cut in the top layer of fabric. (The two layers of linen tape is explained following these pictures.)


Because I was using two layers of fabric, I decided to use two layers of linen tape: one for the conductive thread and the other to give the structure more stability. It also aided in holding the battery opening flaps in place.

inside of front cover and first page
(let the beautiful paper distract you from the bad stitching)

I forgot to note on the picture that the second/bottom sewing tape was glued to the fabric.

Surface mounted LEDs were used for this book. To make them "sewable", I soldered tube crimps, the kind used in jewelry making, to each side. I used a black fabric to suggest the night sky which was a good design decision but an awful demonstration decision. Apologies.

If you have any questions, please feel free to ask in the comments or send me an email via the little widget thingie found on the right side of the blog.
I'm going to put the papermaking projects in a separate post so plan on coming back to read about that!
No comments:
Post a Comment